

Craftsman Bathroom Vanity for a second bath remodel. The contractor grade vanity will be replaced with a counter height vanity we are in the process of building for this post. Our material for this came from a large T.V. entertainment center. We kept this cabinet in storage thinking there has to be some other way to use it. The problem with those centers is they are too big for most rooms. We considered a pantry or wardrobe conversion, but it did not meet the look we are trying to create.
disassembly
I was tired of looking at it in my shop soI decided it was time just to cut it up and take it to the landfill. As I was disassembling it, I realized that the panels are solid and flat, so I stacked it up and tried to think of other uses for the material. I am working on another project in the shop at this time, beehives. I was going to make a few, and this material would be an excellent choice for this project. There will be a separate post for the hives coming soon. That evening we were discussing the upcoming bathroom renovation. So the plan changed, and I will use this material for the Vanity. We want to have a counter height Vanity. If you look at the cost of new material, this is a good use of the old entertainment center.
I like to look at furniture at places like Craigslist, Letgo or consignment stores for sources of material for repurposing. You can pick up one of these entertainment centers for 40 to 50 bucks or even free. Most are wood but, be sure not to waste your time on pressboard or particleboard.
The Plan
We will finish the Vanity in a semigloss white. The drawers and hardware from the existing Vanity will be reused for this project. We will make the lower drawers deeper for taller items like shampoo bottles. We already have the paint and primer from our closet renovation. Total cost for this Vanity so far is zero dollars.
The Vanity top is a cultured marble, which we are planning to upgrade. We are still discussing the material we plan on replacing this with as well. Check out the bath remodel post for the other design elements in our Craftsman bath remodels


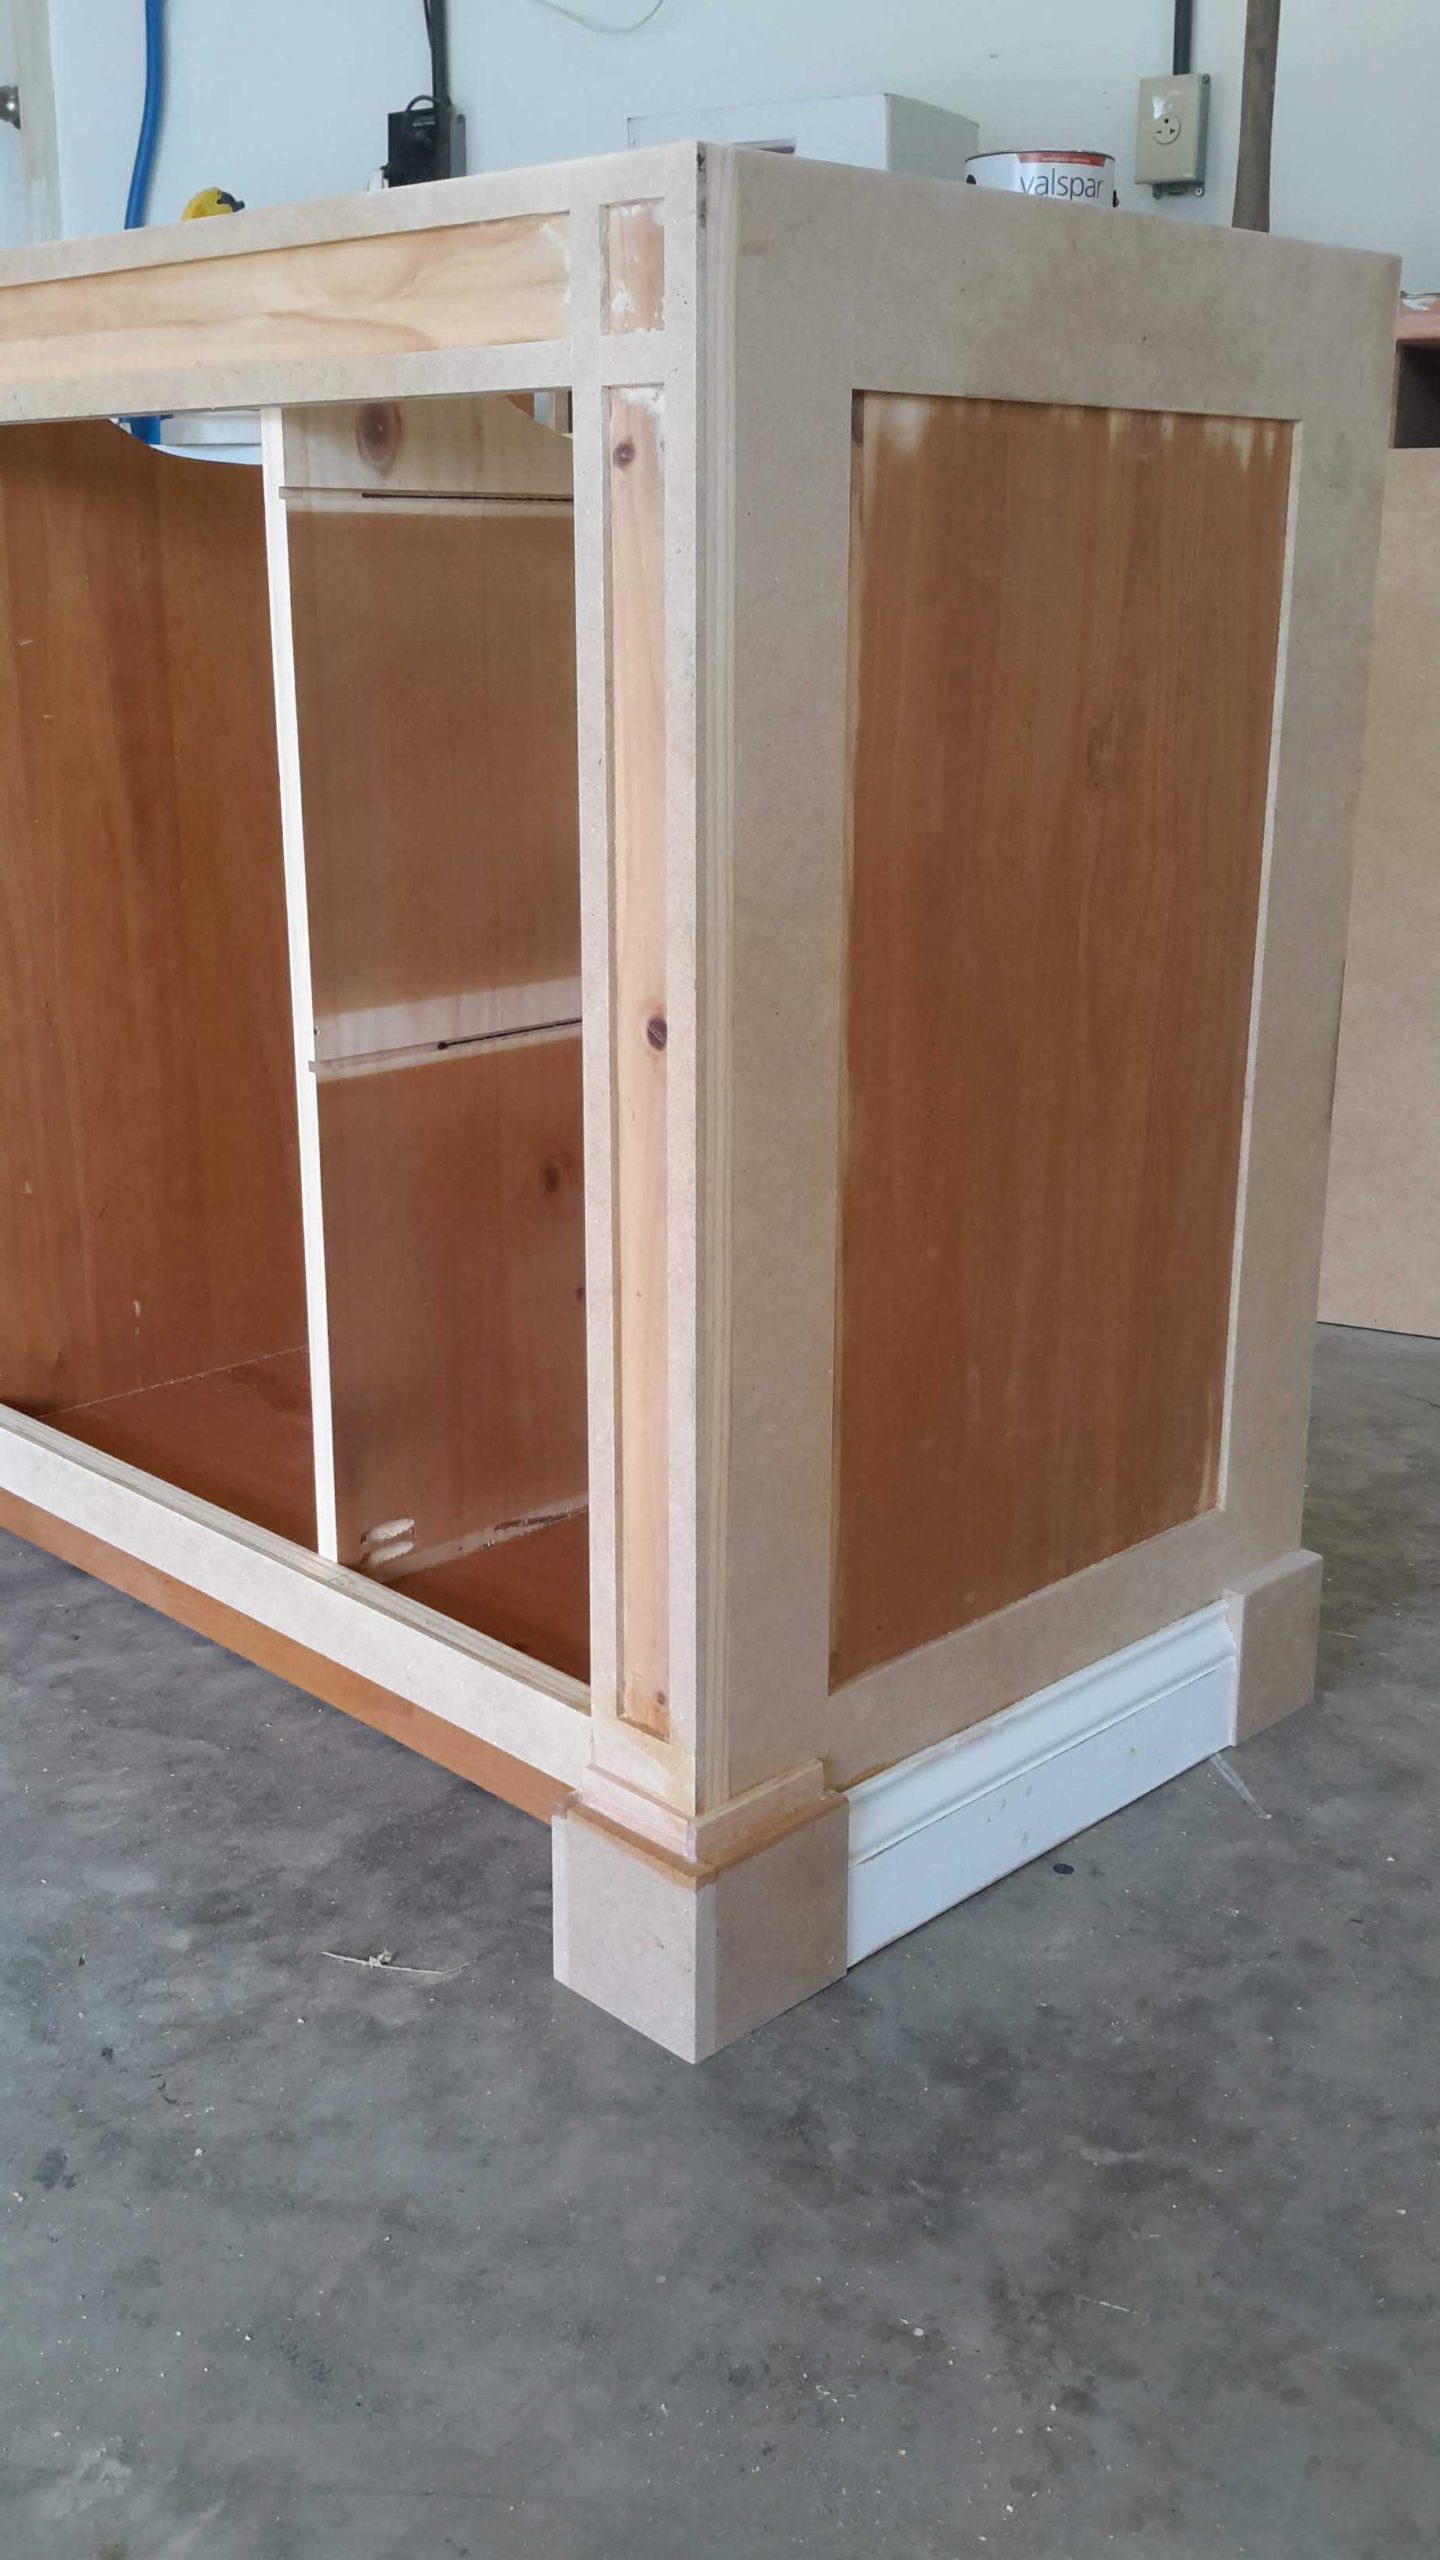

The Vanity is ready for painting. We will add the drawers and hardware after this step, and it will be prepared for installation.
Paint Prep
Before painting the Vanity, I needed to prep the wood. Since this was reclaimed wood, I need to de-gloss the panels. I used a liquid de-glosser, but sanding would have worked as well. After prepping for primer, I filled some imperfections like dents and knots with spackle or wood filler as needed and sanded smooth.
Prime
The next step is to prime the surfaces. I use Kilz High Hide latex primer for this step. Kilz primer sands well between coats and will fill in imperfections rather well. I apply two layers with an HVLP spray gun for even coverage. I use Floetrol to thin the primer for spraying. There are various types of spray equipment. You can use a roller and brush to apply the primer as well. Brushstrokes and roller marks can be sanded smooth before top coating. I use an HVLP setup from Earlex. Properly mixing the paint and additives and following the spray instructions will create a very smooth, durable finish. After mixing, I use a paint strainer as I pour into my spray can. Sometimes latex paint will have thicker globs or debris, and this will clog the gun. I use the Earlex because I had seen a live demonstration at a woodworking show.
top coat
The topcoat is Valspar Cabinet paint. This paint is from Lowe’s. It has been used on other projects like the Master Closet, pantry, and family room. It has proven to be a very durable finish. Cabinet paints have come along way and are now available to the homeowner. I apply it the same as the primer; however, to improve the quality of the finish, I use Floetrol again for a smoother finish. You can tint this paint to almost any color. For our project, we are using it straight out of the can.


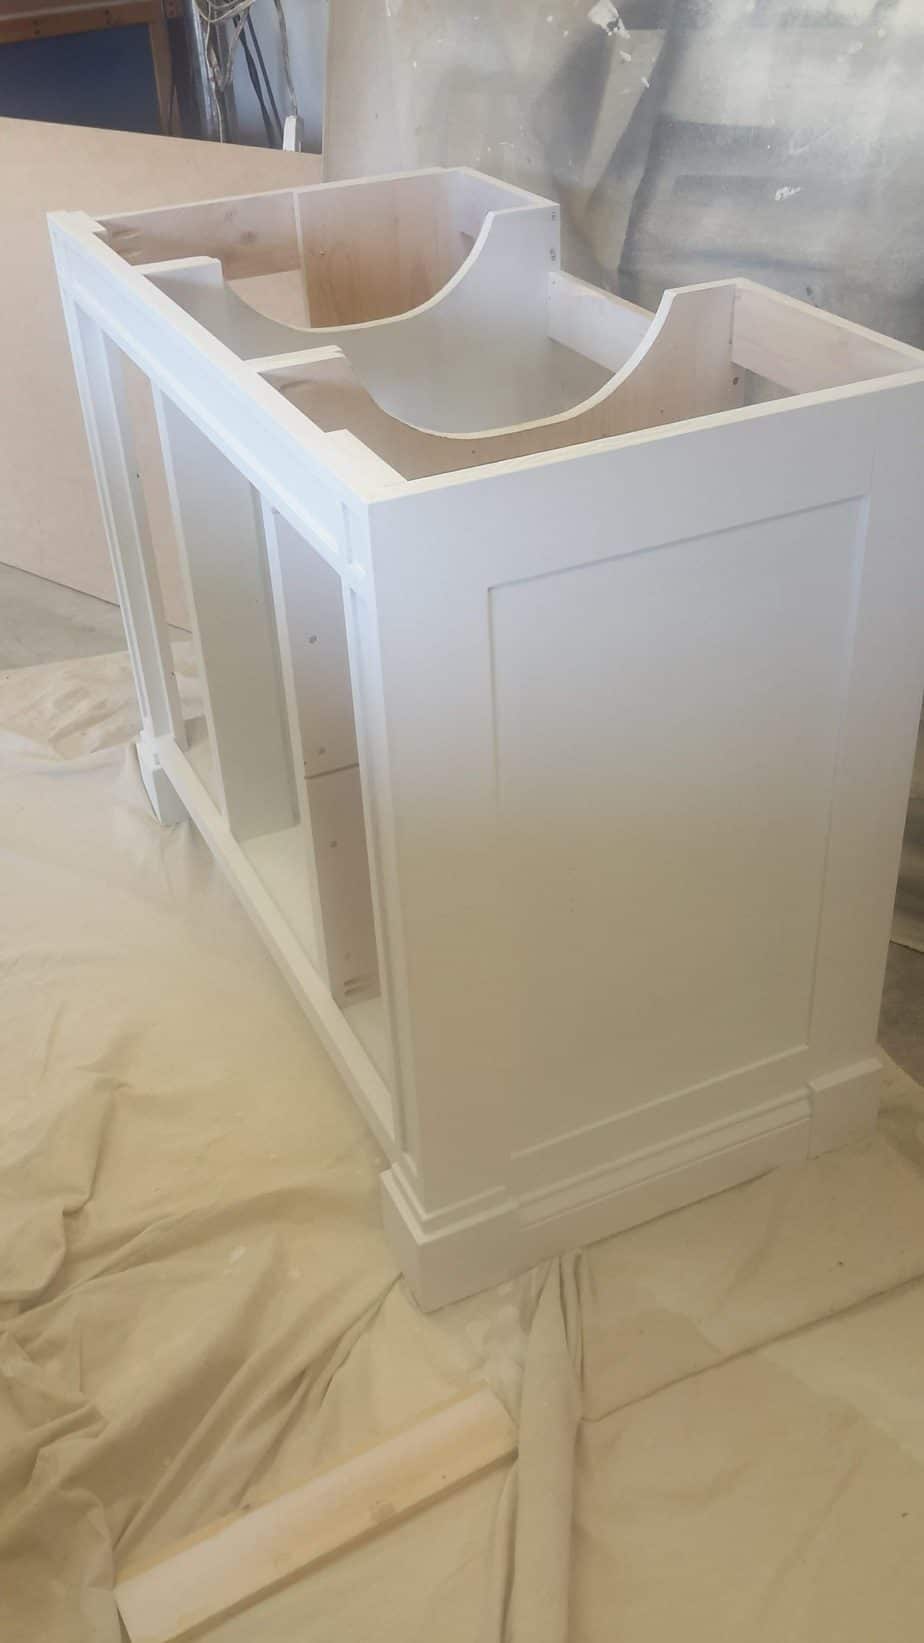
The Craftsman Bathroom Vanity for our second bath remodel is ready for installation. We will add the drawers after the install in case we need to make some adjustments. The sink opening may need some adjustment. We hope to install an under-mount sink in a Quartz top. We are still choosing a color for the room.
Guest Bath makeover
This Vanity is the first step in creating our new Craftsman Bathroom makeover. Our makeover of the guest bath has started. For more information on our renovation, please check back for our next post with details from tile to trim.