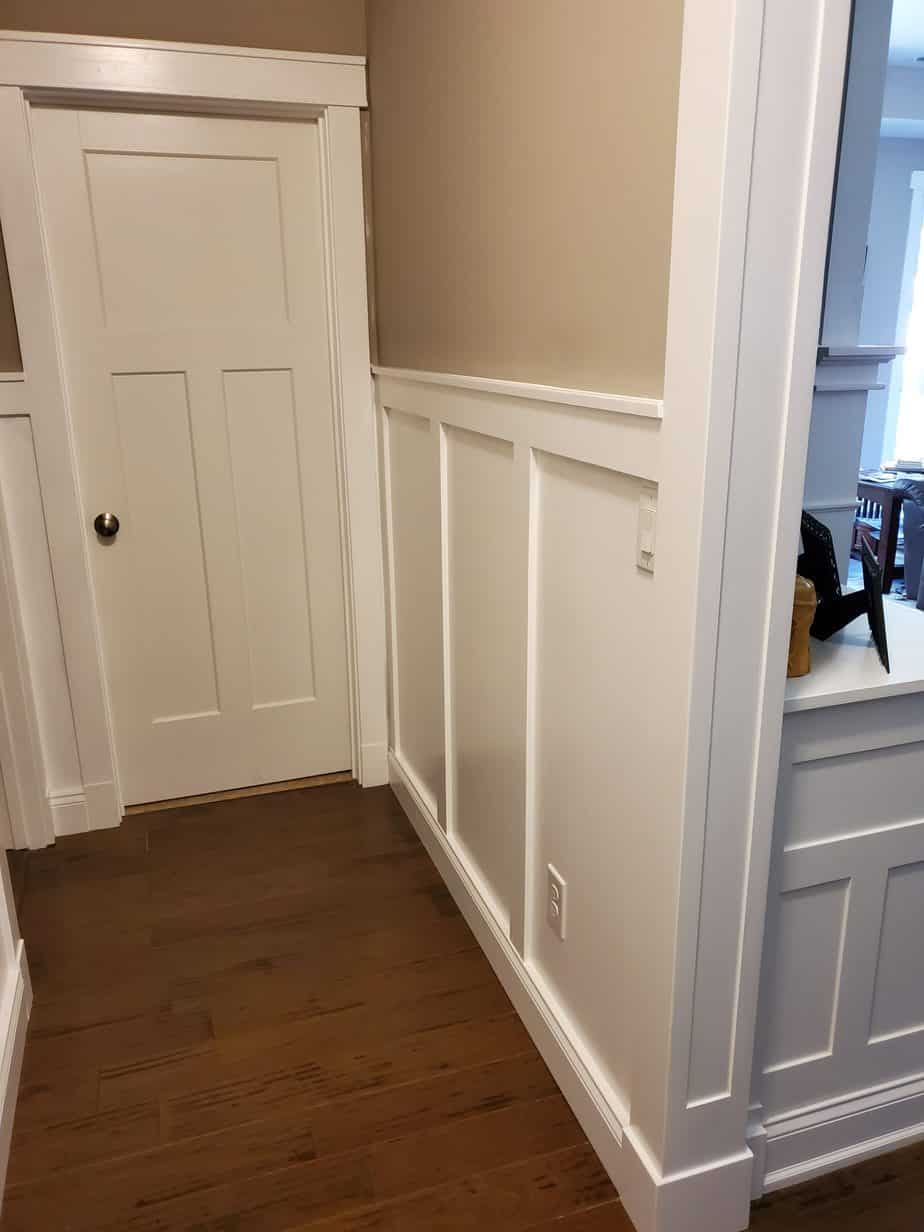
The Handcrafted Craftsman Style Trim and Wainscoting for our bath remodel are complete. The update has added to the craftsman theme of this home. This update was to continue the theme from our bathroom makeover. One of the key decisions for this makeover is to replace the contractor-grade door trim. The trim was not only generic it was of poor quality material and horrible installation. The finger-jointed trim showed through every 4 to 5 inches. Sanding would have been very labor-intensive. None of the doors closed properly leaving gaps you could see through.

Trim
During the removal of the trim from the doors, we found the door jambs were not correctly installed. We corrected all of the door jambs during this upgrade and now they all operate properly.
In keeping with the Craftsman theme, I needed an economical way to obtain the trim. Since we are painting the trim white we opted for using MDF. Fortunately, I have a local supplier that carries it in several thicknesses. 1/4, 1/2, 5/8, and 3/4″ in 4×8 sheets. All the trim was produced in my shop for a fraction of what it would cost to purchase. I could also adust the dimensions to ensure it appears correct in this home.


Wainscoting
During the home construction, the drywall crew covered several electrical boxes with drywall. When the electricians came to install switches and receptacles they needed to find them. The contractor instructed them to knock holes in the wall and he would have the drywall crew repair as needed. Well, they were not happy to have to come back so the quality of the repair was lacking, to say the least.
I had no choice but to replace the drywall in the hallway. We knew we were going to use wainscoting on one side of the hall however we decided it would be more appealing to do the entire hallway. I was also able to relocate the switches and receptacles as needed. The wall switch for the hall light was 18 inches from the corner of the wall. The Handcrafted Craftsman Style Trim and Wainscoting project went so fast that we had forgotten to take progress pictures.
FINAL THOUGHTS
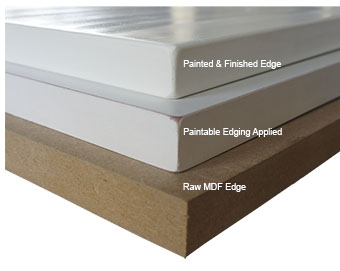
If you decide to use MDF or paint grade pine, priming is essential. When I trimmed my first door I put the MDF trim up with no primer or paint. I thought I would just do it all once it was up. You can do it this way but I found if you do most of the prep in the shop the painted finish will come out much better. When MDF is cut the surface is rough and porous. I used wood glue on all the edges and smoothed it with a wet finger. Once the glue dries a light sanding then primer. It’s a lot of prep work.
I use Kilz primer on all surfaces. Once the primer is dry I would sand this as well. If you have ever tried to sand Latex-based paints and primers you soon find out that the sandpaper gums up with paint. There is a workaround for this and it’s so simple. Since my trim is flat I take a razor blade and scrape all the surfaces and follow up with a Scotch-Brite sanding pad. Blow everything off and install. Fill whatever nail holes and seams and your ready for paint. Prep work is worth all the effort

P.S. you can skip filling the MDF edges with glue. The primer achieves the same result.
